28 April 2013

Getting started with natural cleaning supplies

JosephineStreetParlorNewOrleans1939Mop
Natural Cleaning Supplies


White Vinegar: Used in many formulations. Great for cleaning and disinfecting.

Baking Soda: So many applications. Get the HUGE box and save some money.

Washing Soda: Can be found in the natural section or near laundry supplies in most groceries.

Borax: Boost the strength of cleaning solutions.

Salt: Great for adding an abrasive quality to your cleaners. Kosher or sea salt is best.

Mild Soap: Comes in both flakes and liquids. Vegetable based soap made from coconut or olive oil is known as castile soap and can be found at most health food stores and some groceries.  Comes in scented and unscented. You will want unscented if you plan to add your own essential oils. This is NOT detergent! Many products today are detergents made from petroleum distillates which are both toxic and non-renewable.

Essential Oils: These are not fragrance or perfume oils but the volatile oils of plants. Note: If you have cats or small dog breeds check with your Veterinarian on safe use. Cats and small dogs are especially sensitive to essential oils. Essential oils may also interfere with homeopathic medicines. When in doubt, don't use them until you have consulted an expert. .

Containers: Spray bottles and storage containers come in a variety of sizes and styles and in both glass and plastic. You can usually find them in supermarkets, discount retailers, health food stores and container stores at very reasonable prices.

01 October 2011

Preparing Your Air-Conditioner for Winter


Winter and preparing for winter -- the two seasons in Minnesota and other northern climes. In fairness, you could also go with winter and road construction, but this is a blog about homes, not roads, so there you go.


An important place to start is understanding that air conditioners are meant to be outside and are designed to do that with very little winterizing needed.

I've noticed that many homeowners feel compelled to wrap their air conditioner for the winter months -- something like a swaddling baby -- and some just don't want to hear about how that could cause some bad things to happen.

What bad things, you ask. Well wrapping your air conditioner cause a pocket of air to be trapped around the unit which causes humidity to stay in the unit and this causes the electrical components to corrode and fail.

If you are still feeling resistance to leaving the air conditioner uncovered, you may be thinking about all the rodents that you wanted to house over the winter. They love the protected space and will make some fantastic rodent housing and as an added bonus, they may even eat through the wiring inside your air conditioner.

Do you have additional tips? Share them in the comments.


30 September 2011

Energy Assistance - Minnesota


We really have two seasons here -- winter and getting ready for winter. Every year it gets harder to love living here: snow, wind, cold, below zero, ice...

Winter can be really daunting, especially if you are struggling to make ends meet and you see winter rapidly approaching over the horizon.

The Energy Assistance Program can help you pay energy costs-- like your heating bill-- between Oct 1 and Sept 30 each year. If you qualify, you could receive a grant to cover some of your energy expenses and the grant is paid directly to your energy provider, to reduce your energy bill.

Additionally, if you receive Energy Assistance, you may qualify for weatherization services. These services can improve your home's energy efficiency and lower your energy bill.

Furnace repair or replacement assistance is also available.

Please share your energy saving tips in the comments. 

Links:
Community Action Partnership of Suburban Hennepin - Home Rehab Services 
Community Action Partnership of Suburban Hennepin - Energy Assistance Program 
Minnesota Energy 
Minnesota Energy : Low Income Assistance 
Community Action Partnership of Ramsey & Washington Counties
Minnesota Energy Assistance (EAP) Service Provider List 

Image: Riley


27 September 2011

Polishing the family silver


Winter is approaching and yet I still have no desire to polish silver... weird isn't it? In my quest to always find things that work well and are simple, today I'm sharing a silver polishing recipe from Aggie's kitchen.

  • 1 quart water
  • 1 teaspoon baking soda 
  • 1 teaspoon salt 
  • Small piece of aluminum foil

  1. Place the water in a glass container. 
  2. Mix in the baking soda and salt. 
  3. Add the small piece of aluminum foil.
  4. Soak your silver in the mixture until the silver is clean. Soaking time will depend on how tarnished the silver is. 
  5. After soaking, wash the silver with soap and water and dry well.

Do you have tips for cleaning silver? Share them in the comments.

26 September 2011

How to Clean the Jets in Your Bathtub


I had the opportunity to talk to Scott Bakke, the plumber that installed this Jacuzzi® tub. I asked about jetted tubs in general and about the black flakes and brown scummy bits that sometimes appear when the jets of a tub are turned on.

Those little bit and pieces are actually mold and mildew. Yes, as it turns out, mold and mildew can -- and does -- grow in the pipes inside your jetted bathtub because there is always a little moisture in pipes. This is different than a hot tub/spa which is usually full and holding hot water so not as big of a concern.

Bakke tells me that it's important to clean the jets regularly to keep your tub enjoyable and offered this easy and inexpensive way to do it. 

  1. Check your manufacturer's instructions to be sure nothing you are using is bad for your tub. Once you have confirmed that, fill the tub to about 3-inches higher than the highest jets. 
  2. Turn off the air induction valve. 
  3. Add 1/4 cup of low foaming disinfectant like Cascade dish washing powder. 
  4. Run the jets for 5-15 minutes at the highest pressure. 
  5. Drain the tub and refill with cold water. 
  6. Run the jets again for between 5-15 minutes as a rinse cycle. 
  7. Drain and wipe clean with a soft towel. 
Hope that helps and if you have any tips please share them in the comments.


Photo by Riley

02 July 2011

Most Common FHA Repairs


If you are buying or selling a home and are working with an FHA loan, these are some areas that you'll want to be aware of -- for fixing or as potential roadblocks to a sale. The guidelines are in place because they are related to the health and safety of the occupants -- and also are important for marketing the property.


The most common FHA repairs:

  • If the home was built prior to 1978, chipping, peeling paint must be scraped and painted. This includes interior, exterior, garages, sheds, fences, etc. 
  • Roof should have 2-3 years of useful life remaining and no more than 2 layers of shingles. If the roof is over 10 years old, you must remove snow from a large portion of the roof for inspection by the appraiser. 
  • The cause of wet basements should be cured (e.g., improve drainage away from house, gutters, etc.). 
  • Abandoned inoperable wells must be capped and sealed by a licensed well sealing contractor. 
  • Infestation of any kind should be dealt with or exterminated (e.g., insects, mice, bats, etc.) 
  • Damaged or inoperable plumbing, electric and heating systems should be repaired. The appraiser will check these areas. 
  • Structural or foundation problems must be repaired. 
  • Flammable storage tanks must be removed and filler cap sealed from the inside (e.g., buried oil tank) 
  • If there is a crawl space or attic, it will be the homeowner's responsibility to make this area accessible so that it can be thoroughly inspected.

Keep in mind that these are the most common repairs. Contact your lender with specific questions regarding your property.


Found this list here:  Resources - Most Common FHA Repairs http://bit.ly/jFYUqm


Thanks for visiting and let me know if there is something you would like to learn more about!

09 February 2011

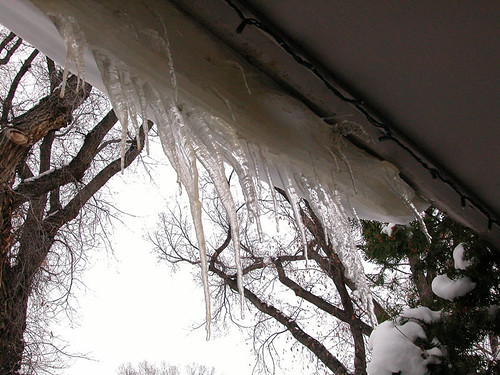
Ice Dam

Flickr/itjournalist


What is an ice dam?

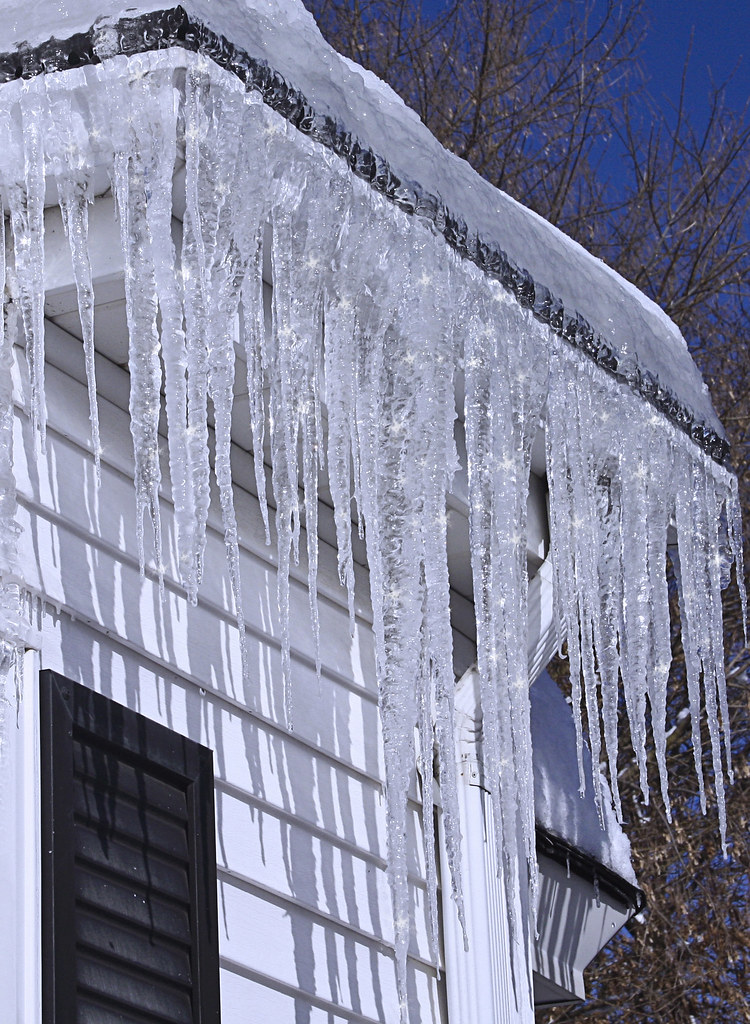
An ice dam is a ridge of ice that forms at the edge of a roof and prevents melting snow (also known as water) from draining off the roof. The water that doesn't drain then backs up behind the dam and may leak into your house causing damage to walls, ceilings, insulation and more.

Ice Dam Prevention 

The dams are bad and you need to do something fast:
  • Remove snow from the roof. You can remove snow with a roof "rake" or push broom, but those may damage your shingles and other roofing materials.
  • If you have a flow of water entering your house, you can make channels through the ice dams to allow the water to drain off the roof. At best, this is a temporary solution.

WARNING!
  • Removing ice dams and snow are dangerous jobs. Anyone working on the top of the roof or below are risking injury and there is a risk of damage to the roof too. You are probably best served to contact professionals to help you with this work.

26 October 2010

Winterize Your Home - Roof, Gutter, Downspouts

 Flickr/Sage Taking A Break

Inspect Roof, Gutters & Downspouts

  • In Minnesota, you know the temperatures are going to be below freezing so you will want to be sure you have enough insulation in your attic to keep warm air from creeping up to your roof and causing ice dams. 
  • Check flashing to make certain the water can't get into your house. If you aren't certain what roof flashing is, This Old House has some helpful information.
  • Replace worn roof shingles or tiles to protect your roof and keep the weather on the exterior of your house. 
  • Clean out any leaves, pine needles, acorns and other items in the gutters. Use a hose to spray water down the downspouts to clear away debris. Having the gutters and downspouts in good working condition will help move moisture away from your house and keep you nice and dry inside.
  • Install extensions on your downspouts to direct the water away from your house. You can also look into leaf guards for your gutters, but make sure you investigate how well they work, some styles are much better than others. 

25 October 2010

Winterize Your Home - Windows and Doors

Photo by Riley


Check the Exterior, Doors and Windows

  • Inspect the exterior of your house for crevice cracks; exposed entry points around pipes and faucets and seal them to prevent cold air from seeping in and keep rodents out.
  • Use weatherstripping around doors to help seal them and prevent cold air from drafting into your house. While you are working on the weatherstripping, run some caulk around the edges of your windows.
  • This is the time to fix cracked glass in windows and doors. If you need to replace an entire window glass, be sure to prime and paint the exposed wood so it is ready to go through winter. Most local hardware stores fix windows in case you need to have that done. 
  • If you have a basement, it would be a great idea to protect the window wells by covering them with plastic shields. This will keep water and debris from filling up the well space and causing water to leak into the house.
  • Now is the time to take your screens down and clean them for winter storage. Then put your storm windows in to help insulate the house. If you don't have storm windows, you can always put up 3M window insulator film to help keep your house warmer. 

24 October 2010

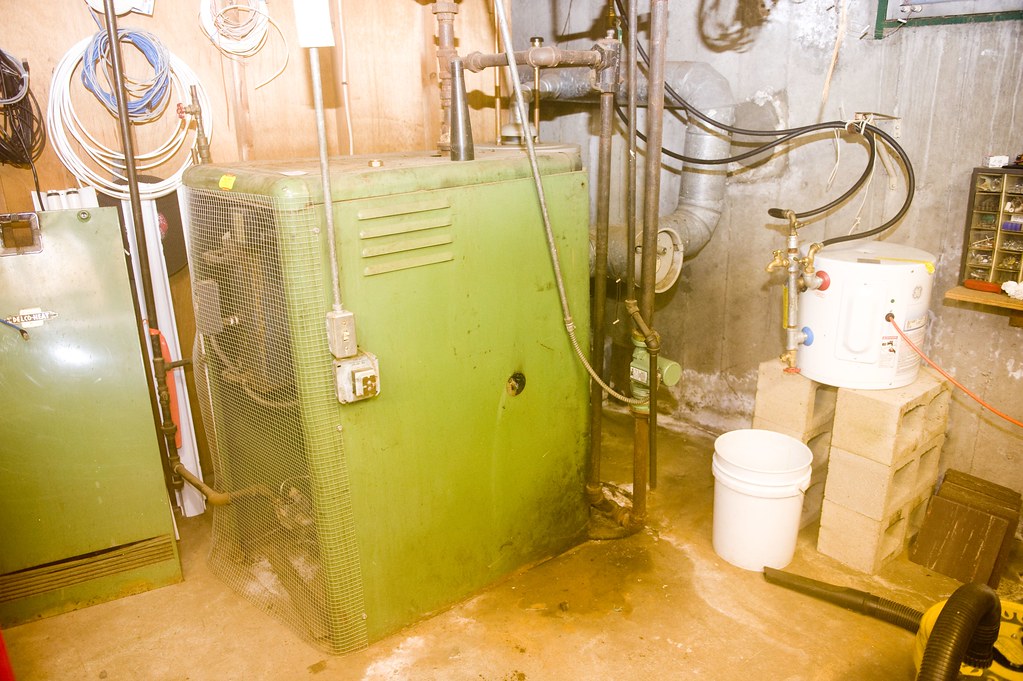
Winterize Your Home - Furnace Inspection

Flickr/Photofarmer

Winter is coming, have you had your furnace inspected so you are ready for the first cold snap? Here are some tips to get ready.

Furnace Inspection

  • Call an HVAC professional to inspect your furnace. If you want, you can have them clean your ducts too, be sure they pull all the gunk outside your home. This step will let you know your furnace is in good condition and is ready to work through the cold season.
  • Stock up on furnace filters and change them monthly. This time of year there are lots of sales on filters so you should be able to find plenty to get you through the entire season at a good price.
  • Consider adding a programmable thermostat. The cost usually runs between $30 and $250 dollars. These thermostats save energy and money on utility bills by allowing residents to set home temperatures according to various different factors. Most homeowners save $150 per year when these are used properly.
  • Remove all flammable material from the area surrounding your furnace. No sense in taking the chance that your entire house will burn because of careless placement of burnable items. 
  •  
     

    11 October 2010

    Basic Home Inspection Items

    Photo: Flickr/kimubert


    These are things a home buyer or seller will likely see inspected -- there will be variables depending on inspectors and locations.
    • Structural Elements - this looks at the construction of walls, ceilings, roof and foundation. Your inspector does not have X-ray vision, so don't anticipate that they will be able to see through solid surfaces. 
    • Exterior - landscape, grading, elevation, drainage, driveway, fencing, sidewalks, fascia, trim, doors, windows, lights and finally siding or exterior of the house. 
    • Garage - standard items to evaluate include slab, walls, ceiling, vents, entry, firewall, fire door, garage door, automatic openers, lights, receptacles, exterior, windows and roof. We check to be sure the auto-reverse on the garage door works and doesn't require too much pressure to go back up. 
    • Roof and Attics - your inspector will look at framing, ventilation, roof construction, flashing and gutters. In Minnesota, we look at how much insulation is in the attic too. We also look at damage from incorrectly vented fans, plumbing and more. 
    • Plumbing - Check to make certain metal matches and there are no other dissimilar materials that would be a problem, evaluate pipe materials for potable, waste, vent and drain pipes. Check toilets, sinks, showers, faucets and traps. Don't expect that your inspector will be inspecting sewer or septic, those, like swimming pools and spas, are usually not covered.
    • Mechanicals - this means the water heater, furnace, air-conditioning, duct work, chimneys and fireplaces. Some inspectors will inspect sprinklers, but many do not.
    • Electrical system - your inspector should look at and evaluate the main electrical panel, circuit breakers, type of wiring, if wires are grounded, receptacles and switches, permanent light fixtures and ceiling fans. We also inspect bathroom fans which would be considered an electrical element.
    • Appliances - it will depend on your inspector on whether these are looked at. Dishwasher, range, oven, built-in microwave, garbage disposal, some detectors and CO2 detectors. 


    Our inspections start at $200, call for more information.

    26 September 2010

    What Be Sure Inspections is Focusing On Now

     Image: Gari.Baldi/Flickr 

    The "new economy" has made many businesses change their direction and focus. We are committed to focusing on the following aspects:

    1. Customer Service. We want to help you by inspecting this house, your next house,  your family member's houses and your friend's houses. We are here to help you! 
    2. Attention to detail. We will inspect the house your are looking at like we were going to buy it. You'll know everything we see and we are there to help you understand the inspection and answer your questions. 
    3. Cleanliness at the Inspection. Rest easy, we will keep the house clean and won't leave behind anything like dropped insulation, tracks or debris. 
    4. Marketing. You are here looking at some of our plan. We focus on word-of-mouth from satisfied customers, but we are here to answer questions too -- whether you are a client or not. 
    5. Connecting with past clients. Like we said, we want to do every home inspection we can for you. We're here to help you. 
    6. Thanking you for your referrals. Yes, you will get a thank you note from us for referrals. We really appreciate them and do drawings for gift cards to show our appreciation. 
    7. Evaluating new opportunities. If there is a way for us to benefit our clients and generate additional income, we will look at the opportunity. Our goal is to keep our prices competitive and our service stellar. If you see something you think we should know about, drop a note. 
    8. Networking. Do you think we can help someone or they can help us? If so, we would love to know about them. Have some tips for how we could network more effectively, please share them. 
    Thanks for stopping past today! 

    25 September 2010

    Working on the Google Site

    Working on the Google web site. We'll see how this turns out. Stop by for a visit and share your thoughts!

    As always, if you are looking for an inspector in the Twin Cities, give me a call. Inspections start at $250.

    Dogs Home TV Ad (every home needs a Harvey)

    03 May 2010

    Overpricing


    Overpricing -- this is the most common reason a house doesn't sell. Following that is the other deal-killer, lack of curb appeal. This applies even if the property is a fixer upper, you have to have some appeal or the buyer won't get past your photo on the Internet and they certainly won't get out of their car and walk up to your house.

    Gone are the glory days with the seller's market. This is an unusually strong buyers market and inventory is at an all time high. Buyers are generally smarter and money is not as freely doled out so your house needs to be as desirable as possible.

    Are you considering putting your house on the market so you can "see" what you'll get, without a need or motivation to sell, you need to be keenly aware of the pitfalls of overpricing. If you find you really need to sell your house down the road and it has staled as a listing that has been on the market too long, your place will be stigmatized. I know, you're thinking I'll re-list at a lower price. Yes, that sounds like a good plan, but buyers are fairly savvy and they look at listings and know if your place has been on and off. Plus, long term lists -- even if the price has become reasonable -- are stilled viewed as damaged goods. Buyers don't want to be stuck with a house that has been on the market a long time.

    Buyers have lots of options available to them right now, and many have been on the market a long time. In our neighborhood, there is one house that has been listed -- with different real estate companies -- since August 2008. This house was overpriced and now probably seems quite stale to most lookers. The sellers probably don't look too motivated and haven't reduced the price enough. Remember, in this market buyers won't look at houses that are overpriced.

    How do you know your price is reasonable? Talk with your agent and be ready to hear their honest input. Are you priced higher than similar houses? Is your house not getting showings? The public is generously providing your answer, your house is overpriced!
    When did you buy your house? Was it right before the economy failed? If so, you bought in a high market and your price now may be considerably less than what you paid. The other thing working against you is your emotional ties to the house itself. You may think it is worth far more than it is.

    As a home inspector, I have seen some real handyman special fixer-uppers, and I can tell you that your best move is to present something that appeals to the buyers on the outside. That first impression is critical and you need to entice people off their computer and ultimately out of their vehicle to come inside. Pull weeds, throw mulch out on flower beds, mow the lawn, trim hedges, declutter and remove trashy looking items. Make sure your entry is clean and freshly painted and spend some time on your entry. At the very least, the property should look like someone maintained it -- whether they did or not. You want to get the best price possible so make your property look the best it can. Remember getting the buyer out of the car is critical, if the place looks dumpy the buyer will get grumpy.

    Selling Tip: Price the property correctly and give it curb appeal.

    Inspection Tip: Have a pre-sale inspection so you know what to fix and you can add that peace of mind for your buyers.

    Links:
    Image http://media.point2.com/p2a/htmltext/f16a/e6d0/4ee5/d7a5459fa2352a974f78/original.jpg

    30 October 2009

    Fall Inspections - Give Your House a Check Up


    No house is perfect, so it stands to reason that all inspectors will find something "wrong" with any house. If you, as a homeowner think the same way a home inspector does, you'll get a pretty good maintenance inspection done before winter hits -- which seems like it might be any day here.


    You probably won't need to hire a professional inspector to do this maintenance check, but you certainly can do that if you want a more thorough examination. Know going into the homeowner inspection that you won't be able to do all a professional inspector does, but you'll still be leaps and bounds ahead of people that never create a list of projects this way.

    Outside
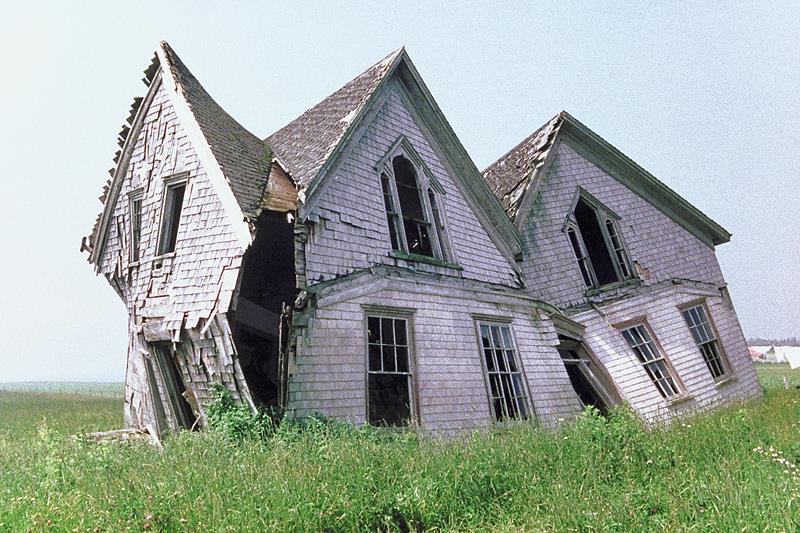
    Start by looking at the exterior of your home. Is there anything that looks out of kilter? Sometimes the house will look like it is leaning a little, or windows won't look even. Check the chimneys, look for broken windows, see if there is staining anywhere on the sides of the house.

    How do the shingles look? (If you don't want to crawl up on the roof, take a look from the ground using binoculars.) Are there cracks, missing shingles, crumbling pieces? Check asphalt shingles for dry, blistering, or curling shingles; wood roofs for rot and splits; slate and tile roofs for breaks, and flat roofs for holes. If you want an easy to way to check for holes, go into your attic on a sunny day and when you are safe and secure, turn off the lights If you see daylight, that is a place water can get in.

    Are there any holes where animals can sneak in and out? (Mice can fit through something the size of a dime, and many raccoons can fit through about a softball size hole.)

    Look for vermin highways too. Trees and shrubs that overhang or touch the house allow all kinds of animals to gain access to your home. In addition, overgrown foliage can hide bigger problems with your foundation, sills or siding. A good rule of thumb is to keep plants far enough away from the house that you can walk between them. While you are out walking around the house, check to be certain the ground slopes away from the house and is at least 8-inches below the sill.

    As you are preparing to go inside, take a look at the sidewalks, patios and driveway before the ground freezes. Make note of potential trip hazards too before winter heaves them even more. Now check the fences, gates and retaining walls to see if any parts need attention before gale force winds start pushing at them and you need to make a fix in below zero temperatures.

    Outside - A Closer Look
    By now, you should have a good idea of the general condition of your home's exterior. You should now train your eye to look for places your biggest enemy -- water -- can encroach on your living space. Water is tricky and can find a way into almost any space, but for your purposes, start by checking around doors and windows. Check to be certain caulking, weather-stripping and glazing hasn't worn down.

    Check wood framing supports for deterioration. You can poke them with a screwdriver to determine if there are soft, flaking, crumbling or damp areas. Double check that all supports are still actually connected to the parts they are meant to hold up. Evaluate any cracks so you know if they have changed or expanded with time.

    Inside Structural Clues
    Now check for structural issues by looking inside the house. Sagging floors, walls, and ceilings are obvious clues to leaks and rot. But seemingly innocuous problems, like peeling paint, sticking doors, loose floorboards, and popped drywall screws can also be signs of trouble.

    Check the basement and crawl spaces for droppings from mice and other animals. Don't neglect checking the fireplace and chimney for birds and other critters that are looking for a warm winter home.

    Even with plumbing, water is still your enemy. While you are going over your house, look for signs of leaks in pipes you can see and check pipes where they go into walls or foundations. Look everything over for signs of rust, pits or excessive green patina on copper and brass fittings which is telling you there is some corrosion. This is the time to add things like dripping faucets, running toilets and slow drains to your plumbing to do list.

    Don't Forget Your Mechanicals
    This is the time of year to schedule your furnace check and annual maintenance -- and ideally before the first cold day when you need to turn the furnace on. At the very least, change the filter. Check for leaks around the furnace and water heater.

    Also take a look at your electrical system and make note of loose outlet covers and plugs. Also look for scorch marks around plugs and in the breaker box which is a sign of dangerous arcing. Test you GFCI receptacles by plugging a lamp into the and then push the test and reset buttons to see if the light goes off and on. Fall is also an excellent time to replace batteries on smoke detectors and carbon monoxide detectors.

    Hire a Professional
    Has it been more than five years since your house was inspected by a professional? Now might be a perfect time to analyze your systems and help make a prioritized repair list. The nice thing about hiring a professional home inspector is the complete and unbiased picture from someone who isn't trying to sell you repair and maintenance services. If you chose to hire a professional home inspector, expect to pay anywhere from $200 to $750 depending on where you live and the size of your home.


    Image